We knew when we bought the boat in 2019 that there was a fuel issue because the filters were partially clogged. We had the voyage from Virginia to Connecticut ahead of us, but Al was not overly concerned because he had plenty of extra fuel filter cartridges and made frequent changes over the 8-day trip.

With all the many “watsonizing” projects during the winter of 2019-2020, the fuel tank worries took a back seat for the moment. The 2020 summer season was super short due to covid and my recovery from spinal surgery, ending with only an additional 20 hours on the engine. In fact, we had yet to put fuel into the tanks. 😳
At the end of the 2020 season, short that it was, it became evident that the diesel fuel and tanks issue could not be ignored any longer.

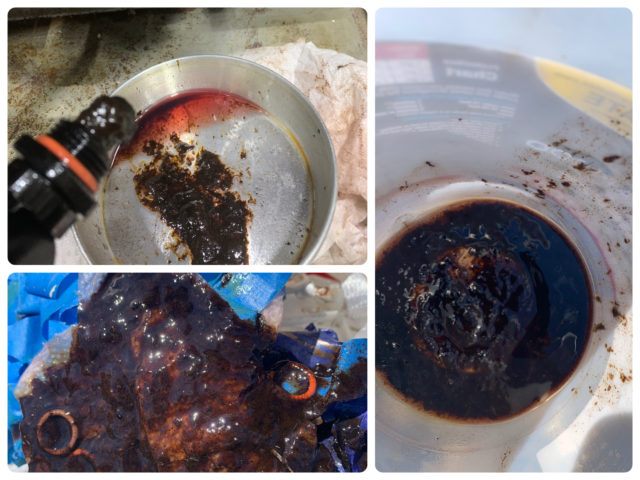
What is that ooey-gooey, black, gunky, slimy, scummy stuff in the filter?????
It is called “diesel bug,” the common term for a mix of various contaminants that include microbial bacteria, fungi, algae, and mold. It can originate from the air or moisture or during tank filling, and can lie dormant until just a little water, even a droplet, is introduced. Then the “bugs” can breed and multiply. Their waste deposits fall to the bottom of the tank. So we either had diesel bug or asphaltenes. Asphaltenes is a tar-like substance that forms in the presence of water and sludge in old diesel fuel. Which did we have? Bugs or tar? Or both? Take your pick. Neither one is good. Either can block filters which in turn can lead to fuel starvation, worn injectors, or even engine failure.
No more procrastinating, the time had come to address this problem. This was not a “fun” project so Al paced it out over the winter.

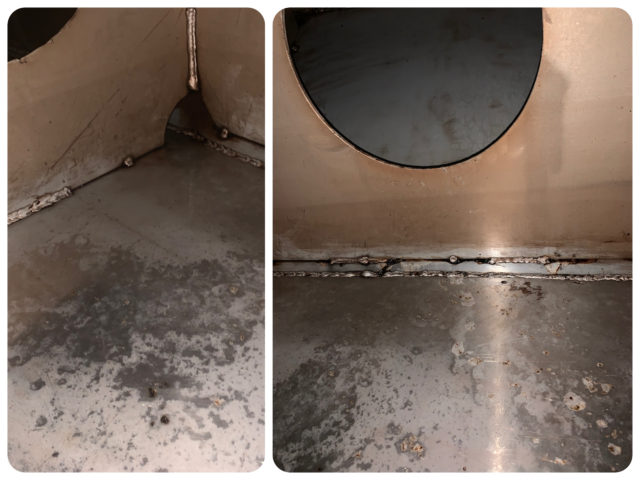
There are two fuel tanks that hold 350 gallons of diesel each, and a built-in transfer pump that moves fuel from one tank to the other. There was 50 gallons in each tank at this point. There are baffles inside of each tank that divide the tank into six parts with 12-inch diameter holes in the middle for the fuel to flow back and forth. First step for Al was to move all the fuel from one tank to the other in preparation of cleaning.

In planning to clean the tanks, Al built a homemade fuel polishing system to clean out the tanks. It removes the fuel from the tank, sends it through a filter, and then returns it to the tank.

Al modified his homemade fuel polisher to take fuel from the tank, pass it through the hose and onto a paint brush at the end of a stick. He then reached the stick into the six compartments of the fuel tank (you can only see two of them in the photo). Using this, he could bring all of the sludge to one point in the tank so that it could be removed with rags and elbow grease into a bucket. Next, he placed three gallons of fuel back into the tank and sloshed it around in the tank, sending it through the fuel polisher for an hour or two until clean.

All that remained was to install a new gasket and replace the inspection port with the 28 bolts. And repeat for the other side. No wonder Al stretched this out through the winter. It took a lot of time and major body contortions to clean these tanks. What a difference!


With proper maintenance and fuel additives, this is one task that should never need to be done again.

Leave a Reply