Trawler Transformation, Part 5 is all about the “below deck” areas, otherwise known as the private areas – two cabins and a head (bedrooms and bathroom to you landlubbers.)
I have been neglectful about completing the blog posts for these final transformations of our Mariner Orient 38. We chose to use and enjoy the boat during our beautiful New England summer. Enjoying it also gave us the opportunity to test all of these renovations before our next big “going south” adventure.
Master Cabin
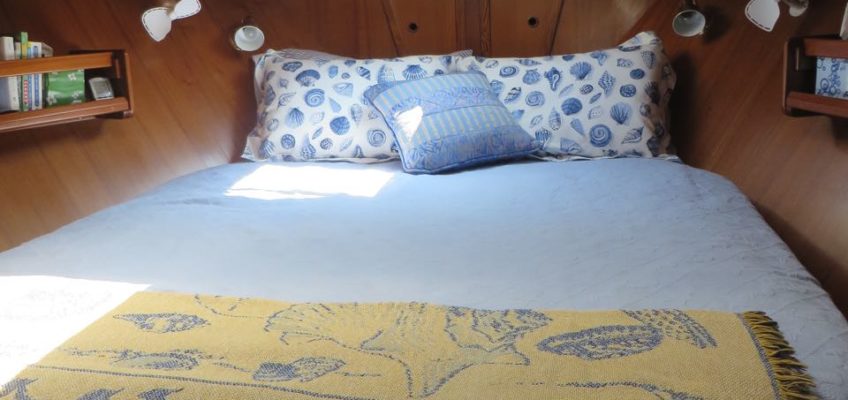
The “master stateroom” (sounds like a mega yacht, doesn’t it?) did not need as much work as the other areas of the boat. It needed brightening and decorating to suit our style.

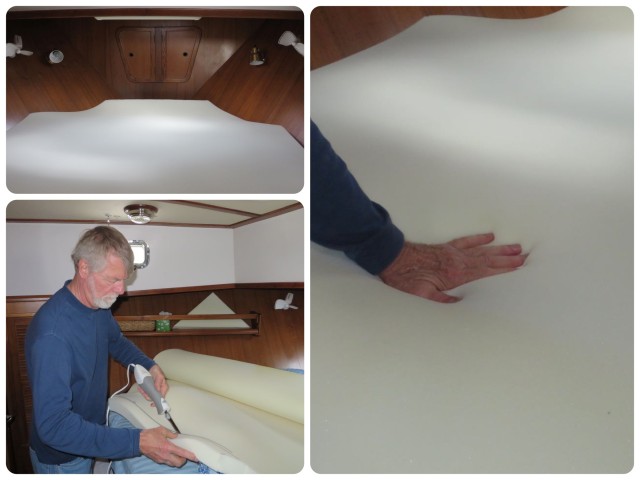
The mattress was in excellent shape (this boat had not seen much use in its first 11 years), but it needed a new topper. Al cut memory foam to fit the contours of the bed.
Making a bed on a boat is never an easy task. No walking around to pull corners over the end, straighten the sides, etc. Al does a better job because his reach is longer than mine (that’s what I keep telling him.)

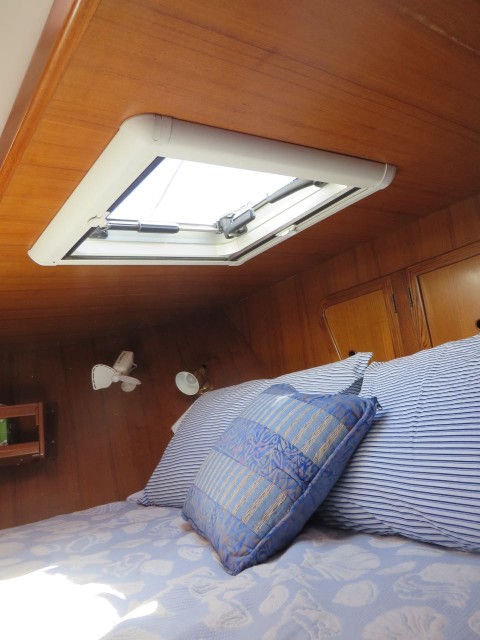
You can see from the old photos that the head of the bed is actually under the front deck on the bow, which can be somewhat claustrophobic. Al decided to fix that with a new hatch. Now we can look at the stars at night over our heads, close it so the sun doesn’t wake us in the morning, and get fresh air. Love it!!
The new “master stateroom” for the Captain and the Admiral:
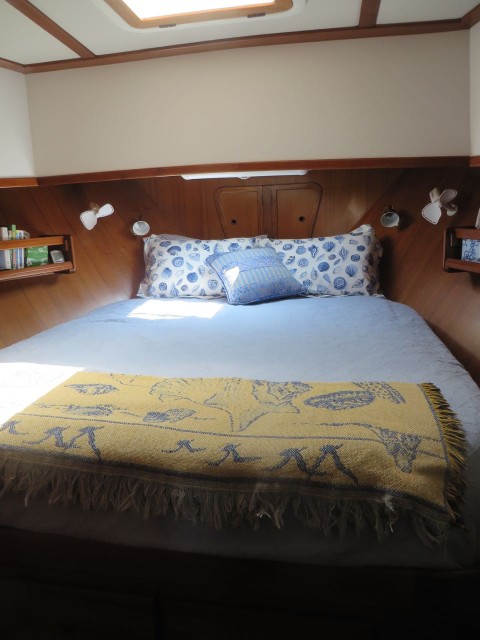
We noticed that the Grand Banks trawlers were white above the bed instead of all wood and decided to use that idea for brightening the cabin. The cabin is so much more cheerful now. Our intention is to hang artwork up there, but we have not found anything yet. It has to be just right.
The shelves along each side of the bed were nice and long, but what do you put there that won’t look messy?? I found these canvas baskets that can be pushed into place and pulled out much more easily than woven baskets. Four for each side, his and hers. We will be able to store a lot of smaller clothing and accessories in these.
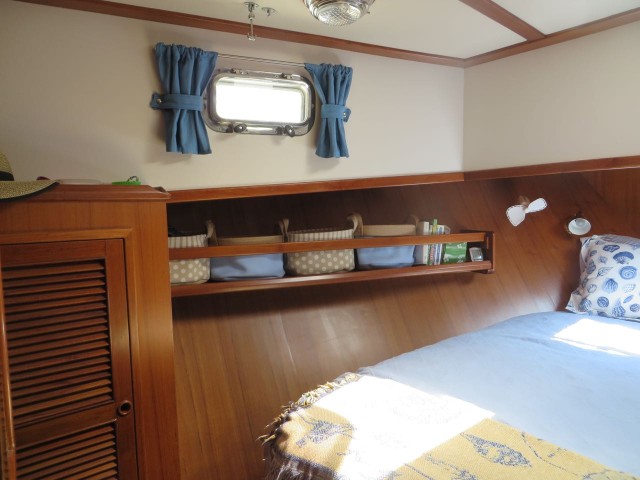
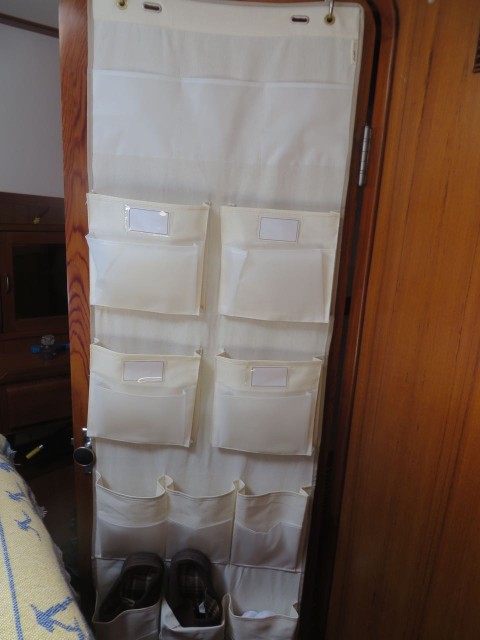
I also bought a hanging door thing in the hope that small items might fit in the assorted pockets. (Is there a name for these now? They once held only shoes, but these new ones have pockets with a variety of sizes.) Have to wait and see how useful this turns out to be.
Guest Cabin
The guest cabin received the biggest makeover. The second cabin on a boat, sail or power, often becomes another storage area. A family naturally has to use it as a real bedroom, but a couple can take advantage of the space for more storage because you can never have too much storage. Ideally, the second cabin can serve both purposes – extra storage and occasional use for guests. The Mariner Orient 38’s guest cabin usually has bunk beds. That might be perfect for some folks, especially families with children, but it wasn’t going to work for us.
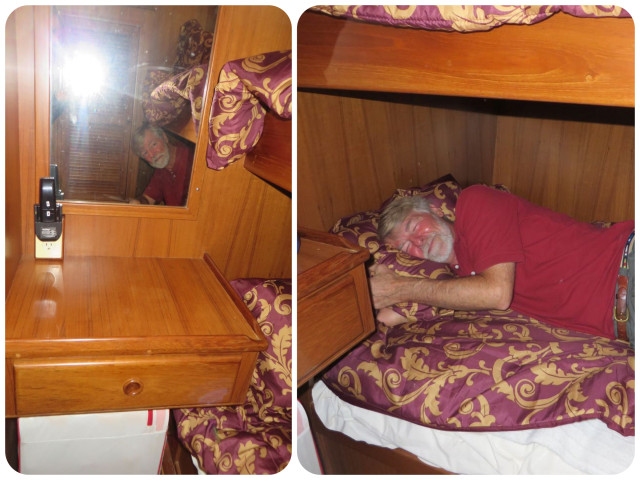
The first step for Al was another R&R, “rip and restore”, project. The top bunk came out.
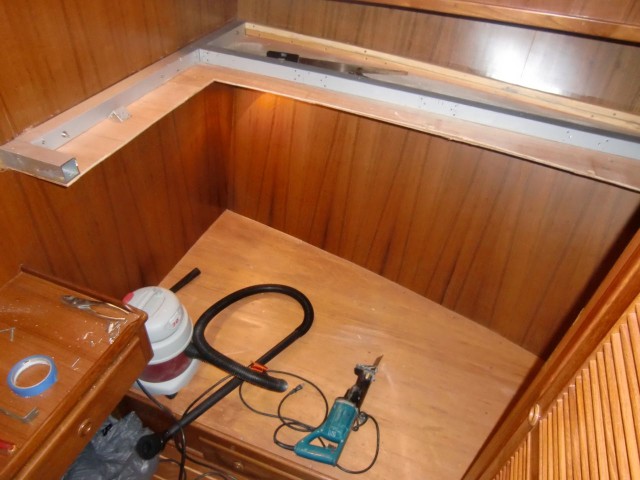
Next step was to raise that lower bunk up, gaining both more storage space underneath and a wider, more comfortable bed.

A wall of white bead board helped to brighten the woody interior of the cabin. We saw that on a Grand Banks and thought it really made a difference. Why not incorporate it into our guest cabin?

I used leftover yardage from the salon curtains to make new porthole curtains. We removed the bottom horizontal bar and allowed the curtains to hang free. That actually makes it much easier to close them when needed and did not affect the way they hang.
The remains of the old upper bunk became a stylish shelf that runs over the head of the bunk and along the side. An extra bar allows charts, books and dvds to be stored there. The shelf holds first aid supplies, and any other items we need to stow.
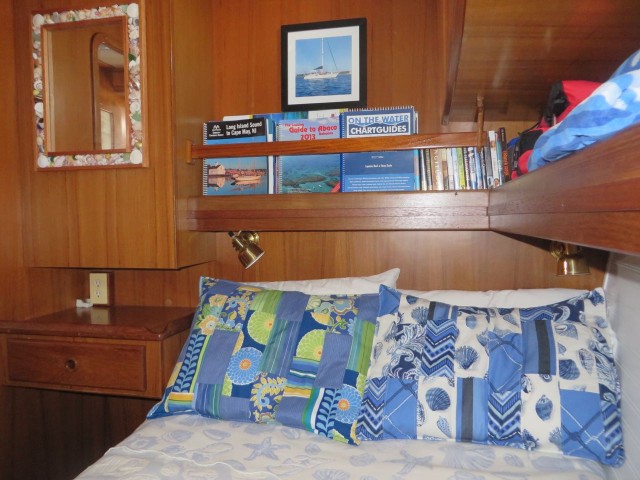
Our custom mirror, a combined effort created over the long cold, snowy, winter, now hangs on the backside of the pantry.
The coverlet is a sentimental piece to us. I found it for our Catalina 34, used it again on the Morgan 43, and now it covers this bunk on the Mariner Orient. Speaking of the bunk, it has a new mattress thanks to IKEA and Al’s talent for cutting foam to fit unusual shapes.
The pillow shams were fun to make. Many cruisers use pillow shams to store extra linens and towels (remember, it’s all about the storage!) I dug through all of the samples I had acquired when searching for boat fabrics. I will admit that it took me an entire afternoon to design and then piece together each of these pillows. Then I was surprised by how much I could fit into each of these shams. Downside – I had no idea how heavy a pillow would be after stuffing it with towels and sheets. My advice – make the pillow shams smaller. 😉
Our cabin is ready for guests – come visit us!
The Head
On a boat, the bathroom is called the head. You may well wonder why this room is called “the head.” I certainly did. I have used the nautical term for many years but really did not know the origin. I’ll share my new knowledge with you: Historically, the toilet was located on the sailing vessel’s bow, the “head” of the boat, for two reasons. First, most ships could not sail directly into the wind, which meant that the wind would come more from the rear of the ship, placing the head downwind. A plus for obvious reasons. Secondly, if the head was above the water line with vents cut near the floor level, the normal wave action coming over the bow would flush out the “facility.” Another plus. Fortunately, for all of us modern sailors, our heads are more comfortable, more attractive, and better smelling, if maintained well. Even so, the bathroom on a boat (I’m not talking about expensive yachts here) is never as large as the one you have in your home, even a small home. And the water is never as hot as often as you want, nor is the water as plentiful. But, you can have a reasonably nice shower to clean off the day’s sunscreen and grime.That’s a priority for me – no shower, no go.
The head when we purchased the boat —
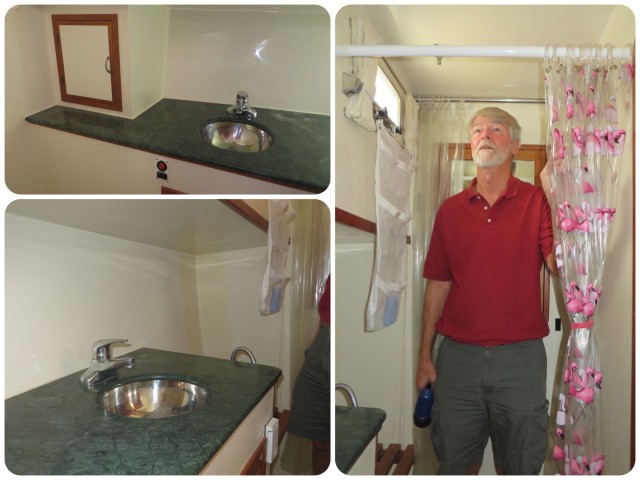
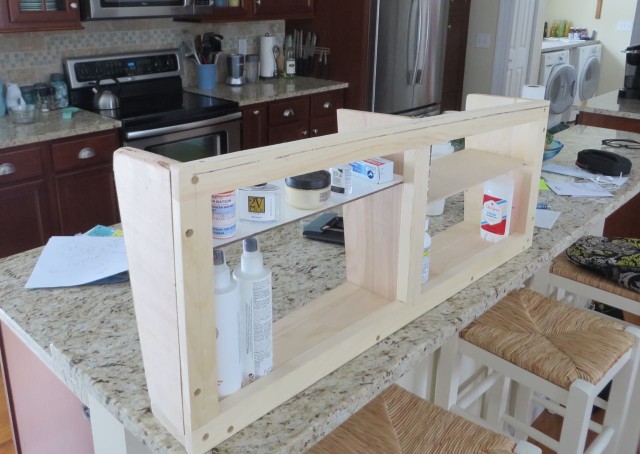
Here again, it was all about the storage. What is it with boat designers??? Do they not see the potential for usable space?? Notice in the pictures above that there was lots of space behind the sink. Lots of empty space. Al designed a toiletries cabinet that would fit there, customizing for the peculiar angles and dimensions.
There was a nice little storage cupboard to the left of the sink with two shelves (hallelujah!), but below that, under the counter, there was more empty space. Al and his sawzall to the rescue!
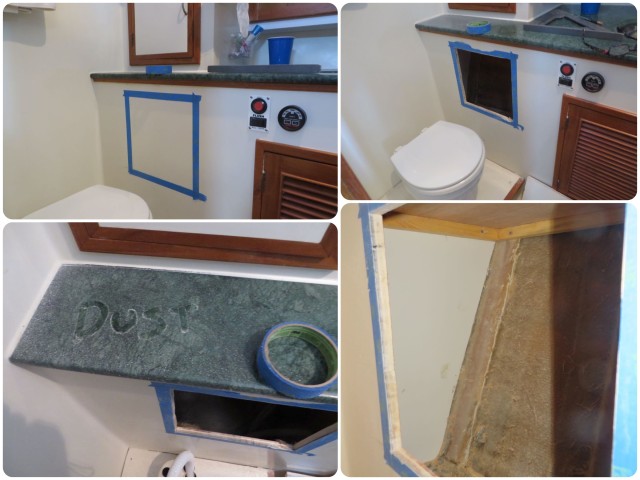
2nd – Cut through the fiberglass with the sawzall.
3rd – Take picture of the dust you made so that Michele knows you had a lot to clean up before she saw your finished efforts.
4th – Admire the new-found storage space. It’s going to hold the extra toilet paper, paper towels….
This toilet is fancier than our sailboats. Instead of pumping a handle to flush, you push the little red button. I guess it is an improvement, but I worry about the chance that something will go wrong and break. The more complicated it is, the harder it is to repair. Al added a holding tank gauge so we can monitor … the holding tank. I think you can imagine what that holds and why it needs to be monitored. Pump out time!
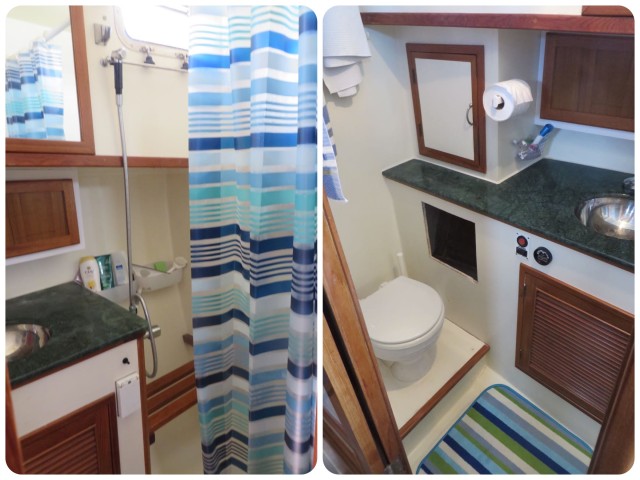
Silly me, I forgot to take a final photo with the nice hatch door on the new storage hole. 🙁 This will have to do.
Television – not “below deck”, but worth sharing.
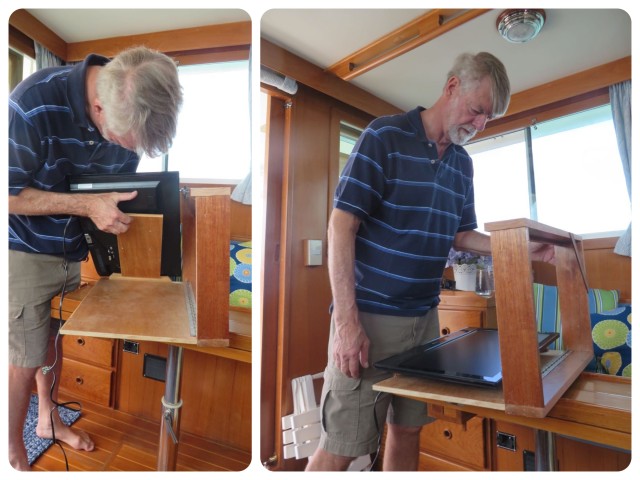
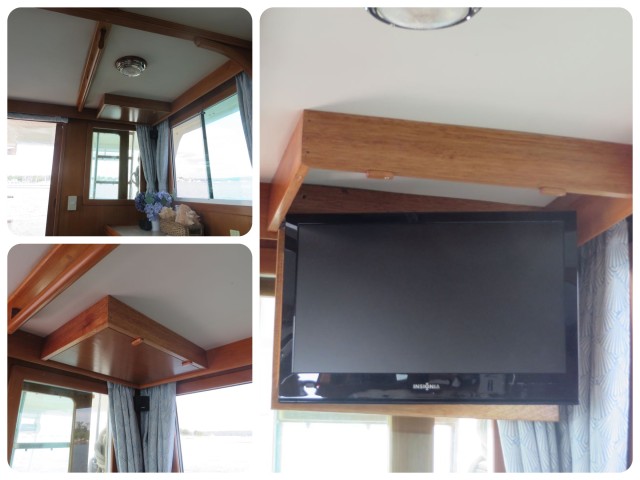
Another “improvement” was just added in the salon, if you consider adding a television to be an improvement to cruising. You can’t always get reception, but if you can, it is nice to catch some news and weather. We don’t watch tv very often on the boat, but this one was the right size and free, thanks to a family member who no longer needed it. I didn’t want a tv to take up valuable real estate in the salon, so Al created a storage cabinet in the ceiling. Add an inexpensive dvd player and we can watch some favorite movies on those rainy evenings or days.
The major renovations have been completed. Al has managed to transform another boat in record time – 12 months instead of 12 years. It was worth staying home this year so that we could both work part-time and get this boat ready. I think she is going to be a very comfortable place to spend 8 months.
Only two and a half weeks left to finish the preparations for another cruising adventure —aye yai yai!



Bob
Great job Al everything looks perfect. I didn’t realize that you were the people,you and your wife that I have started to watch on my I pad. I have truly enjoyed it so far and I will have to go back and finish it. I am still interested in the 38 sedan. Have to do more research. Thanks so much for getting back to me. Hope to talk to you soon. Just a note I also go to RI for the summer.